Wednesday, August 24, 2011

Cards For David...week 3


I can't believe there are only 3 more weeks till my brothers 50th birthday. It has been a fun challenge to send a card and gift every week for 50 weeks.

Don't you love the cards I used for inspiration?! The one to the right is by Dawn Olchefske and the other one sadly I can't find the site again.(that will teach me to write it on the picture so I know who to give credit to)

On my card I used:

Basic Gray, Basic Black, Real Red & Sahara Sand Cardstocks from Stampin Up
The cloud background and paper used for the grass is from the Welcome Neighbors retired paper pack from Stampin Up

I computer generated the saying, silver brads(unknown), stampin dimensionals, mini-glue dots, and the "blue plastic" swirls are from Queen & Co. bold sequins set

Punches used for gril are all from Stampin Up and are as follows:
1/4" circle, 1/2" circle, 13/4" circle, ornament, word window and modern label(in the inspiration cards they used the big shot scribble swirls for the "smoke")
I also used my new grass die from Die-namics of My Favorite Stamps.

Now to just put together a package with some grilling rubs and sauces and week 3 is done. :0)

As always I wish you time to be creative but most of all time to stamp!

Till my next post...

Sunday, August 21, 2011

My Cup Runneth Over!


What a great Birthday I've had. I feel like I've been celebrating for a week! My brother and his family came in from Missouri to celebrate early and we celebrated my great nephew's 3rd birthday too. His birthday was the 19th. It was so fun having everyone here.

As you can see from the pictures I was showered with gifts, cards and well wishes from friends and family. I don't even know where to begin. You make my life a joy unending!!! I love you all so much! :0)

My hubby got me the big garlic holder, 5 new cook books, dinner and a movie. Of course anyone that knows Lee, knows it seems like my birthday EVERY WEEK! HA! He's always doing nice things for me and buying me what every I want. I do love being spoiled. hehe

My brother's family(from Missouri) got me the package in the 3rd picture. I asked for a cloth napkins, a new flour sifter and a bookmark. (I love bookmarks, odd, but true. hehe) I told my sister-in-law that the boys could just make them and maybe put their pictures on them and I would lament them later. I was so surprised by my bookmark she made! Great Job Barb!!! She even found just the right color of cloth napkins. Love em'! I'll have to let you know how I like the books. My husband loves the mini series on TV(Game Of Thrones). I've started them and all I can say is intense! And the perfect snack while I read. These chocolate covered Acai Berries are sooooo good! I collect kaleidoscopes and they got me one in Minnesota. It has the most lovey glass in it. If only I could show you how really beautiful it is to look through with this one. I guess what I love about kaleidoscopes are they make every thing look colorful and different each time you look through them. You just can't feel sad looking through one.

In the 4th picture is the gifts and card I got form my dear friend Debb. I was so totally SURPRISED!!! Debb, really out did herself. She sent me directions to make my own photo spot so I can get better shots of the cards I post.(she's a professional photographer...among many of her talents!) And she knows how I love bling. I will be using the beautiful gem flourishes in a personal scrapbook so I will always look at them and remember her lovely gift to me. The soft colored paper in the picture is "crepe" paper. It's the latest thing in paper crafting. The feel and texture is so cool. I'm not sure what I want to do with it yet. I almost hate to cut it up but never fear I will use it. hehe But most of all I was BLOWN AWAY when I pulled out the Spellbinder set and matching stamps form Our Daily Bread Designs. Lee was laughing at me since I was yelling "OH MY GOD, I love them, I love them! And Debb said I was hard to shop for!" I love it all. You know me so well Debb. The best gift of all is your friendship. I love you dear friend. Lots of hugs and thanks!

The 5th picture is of what was waiting for me when I got home yesterday. My neighbors brought over the most beautiful sunflowers.(They know they are one of my 3 favorites!) And Tonia found MORE dinnerware in my color!!!!! WOO HOO!!! But I have to say I love my Scooby Do pencil box. I love Scooby Do! I can't tell you how many times I've had someone stop by and catch me watching the cartoon! And get aload of my card! I just know Regina made it. :0) She is sooooo talented! I love how she made me Queen on the earth and on a throne on the front with them bringing me gifts. I tell you, I haven't always been the best neighbor but they sure treat me like I am a good neighbor. It is appreciated more then I can say. Thanks to them all.

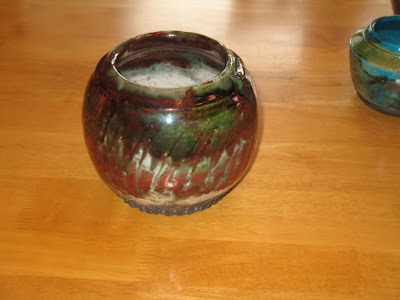
The 6th picture is of a RAKU pot my cousin Steve made for me(his birthday is the 19th). I telling you everyone on my Mom's side of the family is so talented.

In the 7th picture is my hummingbird feeder from my sister and that's her new dog Henry. He is such a nice dog. She's had some nice dogs but Henry has something special. He just got back for a week of training. It was cool to see him doing commands. All I can say is "Mary and Mom keep up the good work with him!"

And I save the best picture for last. My vegan Birthday cake my sister bought for me. It was as delicious as it looked. We got a good laugh too since my name was spelled wrong. :0) We had a great dinner with just family on Friday night and it was just the way I wanted to spend it. Saturday on my birthday since I got up too late to go to my nephew's Birthday party in Parma, Ohio,.

What a great birthday! I feel like the luckiest woman in the world!

Till my next post...


Thursday, August 18, 2011

Cards For David...weeks 5 and 4


Well, my time doing cards for my brother is just about over. I just love how my boxing card turned out. I followed the video by Dawn (Stampin Up demonstrator) on You Tube. I guess what I liked best was I was able to recycle those little boxing gloves. They were my Dad's. They were from a key-chain that had broken and he had saved them. I can remember my Dad coming out and watching boxing matches with Lee. I know my brother will take good care of them and if he ever wants to remove them from the card it has a sliding door to remove them. I can see endless possibilities using this sliding door technique!

The card this week is the skunk. It's from a stamp company called The Cat's Pajamas. I just love there stamps! I used a template from MOJO Monday and a card I saw on Splitcoast Stampers. It showed a flower or embellishment in the right corner but for a man...I don't think so! LOL I didn't do such a great job cutting out the second image of the skunk. Next time I will use an exacto knife. Still, I like how it looks popped up with dimensionals.

As always, I wish you time to be creative but most of all time to stamp!

Till my next post...

Sunday, July 17, 2011

My Craft Area...The Before Pictures


As most of you know I have been moving around all the rooms in my home after we had some major renovations last year. (poorly done renovations I might add but then I digress. hehe) The pictures here are of how I had my stamping supplies stored. Half of everything was in a closet. (pictured above) Sadly tons of stuff was in boxes And the pictures of the room with the toys are now will be my stamping studio. Pictures of new stamp room coming soon.

I know one thing and it is, that I am unable to be creative in a cluttered mess. I need a place for everything and everything in it's place! :0) My new room is right next to my kitchen, I will have plenty of space and if I need a cutting area I can use one of the long kitchen counter tops. The key to my new stamping area is to always put everything away after I use it. Well, at least that's the plan! LOL!

As always, I wish you time to be creative but most of all time to stamp!

Till my next post...

Saturday, July 9, 2011

Cards For David...Weeks 9 and 10


Just a quick post of the cards I made for my brother for the last 2 weeks. Last week I sent the cattail card. I saw a similar card on another blog.  I don't remember where but when I find it I will post it. I changed it a bit. She had the main image at an angle on the page but I just couldn't seem to get mine to look right that way. I also used different colors and shaded the background and around the edges.

I used old olive designer paper and stamped the sentiment(Hero Arts) directly on it with Early Espresso ink. Card stock used was Whisper White, More Mustard, Old Olive and Early Espresso. I used a reverse masking technique. You take a punch and use the punch out area(circle in this case) as a "stencil" to color in. After the moon was on I stamped the grass(Stampin Up) in Old Olive right over the moon. I used a punch(Stampin Up)to make the little "cattails" in Early Espresso cardstock. I sponged the main image with More Mustard and edged it with Early Espresso. Added the "cattails". I used mono adhesive and it dried tacky. OOPS! So I just punched out 12 more and added another layer and used a small amount of crystal effects to attach them. I liked it better because the cattails stand out more. So it's what I would call a happy accident. :0) I then layered the images used More Mustard brads and then used pop dots to lift up the main image.

The ice cream cards were so easy to make.(so sorry I don't know how to turn the pictures upright! ugh!) I followed a video on You Tube by "Chick N Scratch". She had some wonderful ideas. She used decorative paper for her "ice cream" but I used solid cardstock and highlighted it with ink around the edges. I also used the glitter red paper as a trim along the top of the cone. It just looked like something was missing without it. I made one for all the family. My nephews birthday is coming up this week so I thought I would take care of it all at once. I sent along a small ice cream maker, caramel and fudge topping, chocolate sprinkles, a brownie mix and a few dollars for ice cream and whip cream. I think it will hit the spot.

As always, I wish you time to be creative but most of all time to stamp!

Till my next post...

Tuesday, June 28, 2011

New Kitties, Calming Down & Tommorow Is A Brand New Day :0)


Alright, it's 8pm. Lee is in bed. Kittens fed. Talked to my friend Debb. I feel much calmer. What a day!

I hope you like the pictures of the kitties we are taking care of right now. About a week ago I heard their cries. They were under a hosta plant by my front porch. There were 5 of the tiniest kittens I had ever seen. Maybe only a day or two old. I left them alone thinking the mother cat would return. After 2 days and finding that 3 of the kittens were dead. I had to take matters into my own hands. I brought them in and have been hand feeding them. (the first 2 pic's were the first day we had them. The others are about the 5th day)

The tiger cat is a female and the black and white a male. It's funny how in a week you can see they have personalities!

When they the boy will lay his leg over the girls. Such a sweet sight. But what's really cute is Jasper(our male Yorkie) is cleaning the kittens. I never knew a dog would do that.

Well, I know I haven't posted a thing today craft related. But tomorrow is a new day. :0)

Till my next post...

Do You Ever Have One Of Those Days That's Seems To Never END!!!


Ok, I know a lot has happened around our home this year. It was a follow up of having a poorly done remodel by what turned out to be one of the worst companies ever. Ahhh...but I digress. :0) So this year we had made it through the freeze, power outage and flooding. I was thinking I was seeing the light at the end of the tunnel. But it really was the headlights of the train! hehe

Last week I put 4 towels in to wash before bed. Set it like always on a double rinse cycle. Well, when I woke the next morning I walked into a swamp! My rug was soaked and there was standing water all around the washing machine. After cleaning it up you could see the new wood floors buckled. :0( Our washing machine was nothing fancy BUT it wasn't even 6 months old!

The repairman came today and couldn't find anything wrong. Of course I felt like he thought I was lying or probably thought I was crazy! He said he went ahead an over-rode the water level for me.(like this was a big favor) So as soon as he left I put in a load of towels to see if it was like Lee said "just a fluke or air in the line". Ok, you know what I'm going to say next...you can see by the pictures it still isn't fixed.

I started the washer and went to start lunch when I hear Lee yelling "Stop the washer! Water's going everywhere!". So we called the repair guy right back. He hadn't been gone more than 15 minutes. He told Lee for him to call and have US(that's right he wants us) to order a pressure switch. Do you think this sounds like he knew what was wrong and just didn't want to repair it?

After lunch, I have to empty out the water from the drum. The water is ALL the way to the TOP! I guess it's a good thing he over-rode the water level! HA! I know they will come out and fix it when the part comes in but I will always feel a sense of worry every time I wash a load of clothes. I'll worry is it going to leak or is it just going to break. All, I can say is no more Whirlpool! I'm going back to Maytag!

Ok, no more ranting...

Saturday, June 25, 2011

Shaving Cream Technique ...Step By Step


I have had a few requests to share how to do this fun technique. I haven't figured out how to post under each picture so I hope my directions will be clear enough. I really can't wait to get a good camera to do videos! Ok, so here goes!

1. Pictures of all supplies. (you don't really need the freezer paper but my counters are white laminate and it helps for a little extra stain protection. But most of all it just makes clean up a breeze!)

2. First put shaving cream on paper plate. (if you are doing bunches you could always use a cookie tray covered with foil) Do not use gel shave cream. I find the cheaper white foam type shaving cream works the best.

3. smooth down the shaving cream...it doesn't have to be perfect just not big bumps. (I used a plastic spoon to smooth it down...oops! I didn't picture that in the supplies)

4. using the reinkers now place drops of chosen colors.(I wear gloves at this point to keep the ink from my hands) You can use as many colors or just one color. The possibilities are endless) I'm not sure if you can use any reinkers. I have only used alcohol based ones. If anyone knows please post the answer for us. I will also check and add any info I find to the comment section on this post. :0)

5. next take toothpicks and slide it up and down(or swirl) to move the colors around. I used toothpicks this time but I think I like using a plastic fork better. It seems easier to manipulate the ink better. You can swirl the ink anyway you like.

6. now just lay your cut cardstock on top of the shaving cream, press down a bit so as to make sure your cardstock it making complete contact to the shaving cream so as to pick up your ink pattern. I used Whisper White cardstock from Stampin Up for this demo.

7. now gently peel the cardstock holding one corner off the shaving cream and place on paper towel.

8. I turn my cardstock upside down and press squeezing off as much of the shaving cream first. Then turn it over and gently wipe with a paper towel. Viola! You now have your shaving cream background. if you notice in the pictures I have one that is a bit lighter that is the second piece I used. I keep repeating the process(I didn't add more ink) but just swirl the ink a bit and use it till it's too light for your taste. You can always add more ink to keep going if you are making a lot of backgrounds at once. You can make a lot of backgrounds with not much shaving cream!

9. let dry then you can use as a background or stamp directly onto the paper. I made two very quick cards to show you both. I still need to tweek them a bit. Some crystal lacquer and glitter on the balloons. Pearls and use the glitter pens on the butterfly card. But I thought this would give you an idea of what you can do. (I'll come back and add the pic's of the cards once I have them "blinged" up! LOL)

I hope you'll give this a try. I know it's a messy techinque but it is so cool to see the papers when your finished.

As always I wish you time to be creative but most of all time to stamp!

Till my next post...

Monday, June 20, 2011

Card For David...Week 12


As you all know I have been "blog surfing" to get masculine card ideas. This card is inspired by the card I found on Marie Shaughnessy's blog Called "Stamping Inspirations" at WWW.mariestamps.com. Her site is set up so nicely. It has all the categories on the left hand side. The card I used for inspiration was designed and created by Jenni Shaughnessy. It uses a shaving cream background. I had done them years ago but I loved the look of the card so put my own twist on it.

The pictures on my post show the supplies used. My first attempt was to make the card with 2 or 3 colors of blue but I just didn't like it. So I went with just one color(night of navy). I used all Stampin Up supplies except for the 3 tiny brads. They are "outdoor denim" from Close To My Heart. I left off the bakers twine she used on her card and instead just used some dimensionals to pop up the compass. I stamped the boat and the compass twice. Cut out the center piece of the compass and the sails then used dimensionals on them for some more dimension. I loved using my color spritzer tool. It gives it the feel of the water splashing around the boat. After I was done, I kept looking at my card thinking what was off? Well, in Jenni's card she had the "shaving cream" background going across the page like water. DUH...I put mine up and down. :0) I still love how mine turned out. A clean and simple design always works for me.

And as always I wish you time to be creative but most of all time to stamp!

Till my next post...